How to Use Woocommerce CSV Import Tutorial
If you are a blogger or dropshipper, chances are that you are familiar with Woocommerce. This free application has become one of the most widely used e-commerce plugins for WordPress and makes selling items online quick and easy.
Did you know that there is an easy way to import multiple products and categories to your online dropshipping store? The process of importing products using a CSV file is pretty straightforward and is well worth your time.
Using CSV files is a great way to import multiple products and categories at once. This will allow you to focus on other tasks related to your blog or business.
In this Woocommerce CSV tutorial, we’ll show you how to download our preformatted CSV file, choose select categories to upload, and finally how to upload the CSV file to your online store.
Just follow our step-by-step Woocommerce CSV import guide and learn how to stock products like the pros.
Woocommerce CSV Import Tutorial
Click here to watch our CSV category import video tutorial!
Before getting started with the tutorial, make sure that you have already downloaded the Woocommerce plugin to your WordPress blog.
If you are unsure how to download and activate the Woocommerce plugin, check out this helpful guide to get you started.
Download the Woocommerce CSV File
At GreenDropShip.com, we like to make things easy for our members. We provide preformatted CSV files for both Woocommerce and Shopify. This means that you can stock your dropshipping store with just a few clicks.
- Sign into your GreenDropShip Members account
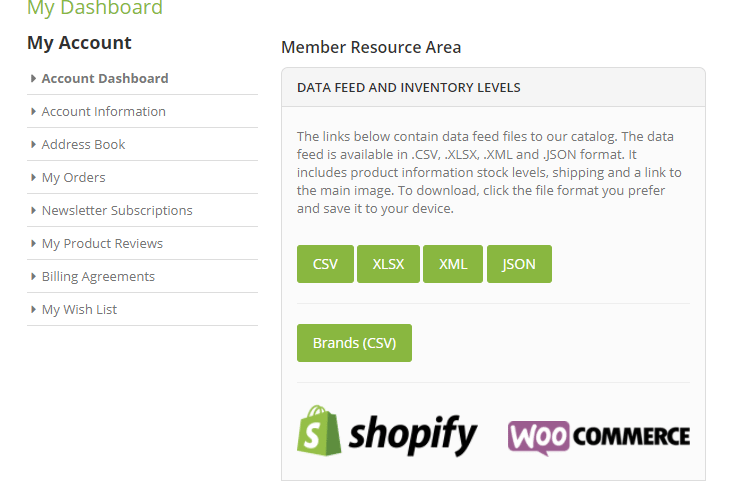
- Under the “Data Feed and Inventory Levels” section, click on the Woocommerce logo to download the CSV file (as pictured to the right)
- Save the file to a location of your choosing
Edit the CSV File (optional)
There are times where you might want to edit your CSV file before uploading it to Woocomerce. For instance, if your niche is selling frozen foods, you will need to remove all of the products that are not frozen foods.
To do this, you will need to:
- Open the products_woocommerce file you just downloaded (you will need Microsoft Excel to edit)
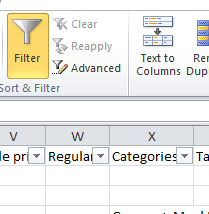
Excel Filter Drop-Down - Select the “Data” tab located on your toolbar (at the top)
- Choose “Filter” under the “Sort and Filter” heading
- Now scroll over to column X where you will find the “Categories” heading
- You should see an arrow that presents a drop-down menu. Click the drop-down arrow and open the menu
- In this menu, you will see a list of every unique category in the CSV file.
- At the very top of the list, uncheck “Select All” box
- Now, reselect the categories you want to include in your store
- Select “OK”
- Now go to “File”
- Select “Save As”
- Title the edited CSV file something different from the original and choose a location to save
- Select “Save”
You can further customize your CSV file to by editing the product descriptions, SKUs, and other attributes within Excel. Just be sure not to change the filetype to anything other than CSV (comma delimited).
Important: Make sure not to change the headers or order of the columns. This could cause errors when importing your CSV file into Woocommerce!
Import the CSV File to Woocommerce
Once you have downloaded your CSV file and made your edits, you can import your file to Woocommerce.
- On your WordPress site, go to the “Tools” tab on the left-hand side
- Under the “Tools” tab, select “Import” from the drop-down menu
- Scroll down until you see “Woocommerce Products CSV”
- Just below “Woocommerce Products CSV”, you’ll want to click on “Run Importer”
- Select the “Choose File” button and find the GreenDropShip CSV file titled “products_woocommerce”
- Select the “Continue” button
This will take you to the column mapping step of the CSV import process.
You should see the heading “Map CSV fields to products”. What this means is that Woocommerce will compare the fields in your CSV file to the fields in Woocommerce.
Since we are using the preformatted Woocommerce CSV file provided by GreenDropShip.com, every field will be mapped correctly. This means that we don’t have to worry about changing any of the mappings.
- Scroll to the very bottom of the “Map CSV fields to products” and select “Run the importer”
Once you have selected the “Run the importer” button, it will take a few minutes to upload your products. Depending on how many products you are importing, this may take some time.
It is always a good idea to check and make sure that everything is uploaded correctly. Check to make sure that the categories you selected appear on your WordPress website.
What is a CSV File?
CSV is short for “Comma-Separated Values”. Basically, a CSV file is a spreadsheet that has been formatted in a way that the application reading the file can easily determine where each value begins and ends.
These file types are helpful to use because they allow you import and export lots of data quickly and easily.
CSV files are handy whether you are a niche blogger interested in importing certain categories or a business owner looking to import an entire catalog of products.
If you haven’t already, be sure to watch our video tutorial on how to import CSV files to your Shopify store!
As always, be sure to subscribe to our mailing list to get our exclusive product catalog and stay in the GreenDropShip loop!
[contact-form-7 id=”5741″ title=”Front Page Subscribe”]
Related